Mayumiotero – Aromatherapy candles can turn an ordinary room into a calmer and more personal space. Their warm glow creates a gentle atmosphere, while carefully selected scents help shape the mood. Lavender may support a peaceful evening, citrus can make a workspace feel fresher, and vanilla often adds a sense of warmth. However, making these candles at home offers more than fragrance alone. It also gives you control over the wax, scent strength, container, and overall design. In my experience, the process feels surprisingly rewarding because every small choice affects the final result. Moreover, homemade candles can become thoughtful gifts or decorative pieces. They may even inspire a small creative business. Although the first attempt may not look perfect, the learning process remains enjoyable. Therefore, beginners should focus on safety, balance, and simple techniques before experimenting with complex designs.
Read Also: Realme Ends Realme UI Era and Embraces ColorOS for a Unified Future
Choose the Right Wax for a Cleaner Candle
The type of wax plays an important role in how a candle burns and releases fragrance. Soy wax remains a popular choice because it is easy to work with and often burns more slowly than traditional paraffin wax. Beeswax offers a naturally warm color and a mild honey-like scent. Coconut wax, meanwhile, creates a smooth finish and can provide excellent fragrance performance. Paraffin wax is widely available and usually affordable, but some makers prefer plant-based alternatives for environmental or personal reasons. For beginners, soy wax flakes are often the most practical option. They melt evenly, clean up easily, and work well in glass containers. Nevertheless, each wax has a different melting point and fragrance capacity. Therefore, always read the supplier’s instructions before starting. A successful Aromatherapy candle depends on using materials that work well together rather than simply choosing the cheapest available option.
Gather Simple Tools Before You Begin
Good preparation makes candle-making safer and more enjoyable. You will need wax, cotton or wooden wicks, heat-resistant containers, essential oils or candle-safe fragrance oils, and wick stickers. You should also prepare a digital scale, thermometer, pouring jug, stirring tool, and double boiler. A pair of scissors will help trim the wick after the candle sets. In addition, keep paper towels nearby because melted wax can drip during pouring. Avoid using containers with cracks, thin glass, or unknown heat resistance. Although recycled jars may look attractive, not every jar can safely handle candle heat. For this reason, proper candle containers are the better choice. Before melting anything, place all tools within reach and protect the work surface. This simple step reduces stress later. More importantly, it prevents you from searching for equipment while handling hot wax. Careful preparation is one of the easiest ways to improve both safety and final quality.
Select Scents That Match the Mood
Choosing a fragrance is one of the most enjoyable parts of making Aromatherapy candles. Lavender, chamomile, and cedarwood can create a soft evening atmosphere. Lemon, orange, and peppermint may feel brighter and more energizing. Meanwhile, vanilla, sandalwood, and cinnamon often produce a warm and comforting mood. However, essential oils do not always perform the same way in hot wax. Some scents may fade, while others can become stronger than expected. Therefore, start with simple combinations and test them in small batches. Lavender and vanilla create a balanced relaxing scent. Lemon and eucalyptus feel clean and refreshing. Orange and cinnamon suit a cozy seasonal candle. Still, avoid adding too much oil. Excess fragrance can affect the burn, cause sweating, or create an unpleasant smell. Always follow the recommended fragrance percentage for the wax. A well-balanced candle should smell inviting without overwhelming the entire room.
Melt the Wax Slowly and Safely
Melting wax requires patience because excessive heat can damage both texture and fragrance performance. First, place the wax in a pouring jug or heat-safe bowl. Then, use a double boiler to heat it gradually. Avoid placing wax directly over an open flame. Stir gently as the wax begins to melt. Next, check the temperature with a thermometer. The ideal temperature depends on the wax type, so follow the manufacturer’s guidance. Once the wax melts completely, remove it from the heat. Let it cool slightly before adding fragrance. This waiting period matters because very high temperatures may weaken delicate scents. In addition, slow heating reduces the risk of discoloration and uneven texture. Never leave melting wax unattended. Keep water away from the mixture because even a small amount can affect the candle. Although the process is simple, attention to temperature often separates a smooth candle from one with cracks, rough surfaces, or weak scent.
Add Fragrance at the Correct Temperature
The fragrance stage requires accuracy rather than guesswork. Measure the oil with a digital scale instead of using random drops. This method helps you repeat successful recipes later. In most cases, fragrance should be added after the wax has cooled from its highest melting temperature. However, the exact point varies between wax types. Once the wax reaches the recommended range, pour in the fragrance and stir slowly for about one to two minutes. Gentle stirring helps distribute the scent evenly without creating too many air bubbles. At this stage, you may also add candle-safe dye. Use only a small amount because dark colors can affect appearance and wick performance. For a natural look, leave the wax uncolored. Many handmade Aromatherapy candles look elegant with a simple cream or white finish. Most importantly, never use food coloring, perfume, or oils that are not suitable for candles. Safe materials support a cleaner and more reliable burn.
Position the Wick Before Pouring
A centered wick helps the candle burn evenly from beginning to end. Attach the wick tab to the bottom of the container with a wick sticker or a small amount of heat-resistant adhesive. Then, keep the wick upright with a centering tool, chopsticks, or two pencils placed across the jar. Check the position from several angles before pouring. Even a small shift may create an uneven melt pool later. Next, pour the scented wax slowly into the container. Leave a little space at the top for a clean finish. Pouring too quickly can create bubbles, splashes, or movement around the wick. Afterward, avoid touching or moving the container. Let the wax cool naturally at room temperature. Sudden cooling may cause cracks or sinkholes. Although waiting can feel difficult, patience improves the final appearance. A properly positioned wick also improves safety because the flame remains away from the container’s edge.
Read Also: CGI The Visual Technology Behind Stunning Digital Worlds
Allow the Candle to Cure Properly
A candle may look finished after the wax hardens, but it still needs time to cure. Curing allows the wax and fragrance to bond more evenly. As a result, the candle may produce a stronger and more balanced scent when burned. Soy candles often benefit from several days of curing, while some makers prefer to wait one or two weeks. During this period, place the candle in a cool, dry area away from direct sunlight. Covering the container can protect the surface from dust. Once cured, trim the wick to about six millimeters before the first burn. A short wick helps control the flame and reduce smoke. On the first burn, allow the melted wax to reach close to the container’s edges. This process can prevent tunneling. In my view, curing is the most overlooked step among beginners. However, it often makes a noticeable difference in scent quality and overall performance.
Test Every Candle Before Regular Use
Testing is essential, especially when you change the wax, wick, fragrance, or container size. Burn the candle in a safe location and observe the flame, melt pool, scent, and container temperature. A flame that grows too high may indicate an oversized wick. A weak flame or narrow melt pool may suggest that the wick is too small. Watch for smoke, mushroom-shaped wick buildup, or excessive heat. If the container becomes dangerously hot, stop using the candle. Keep the candle away from curtains, children, pets, and moving air. Never leave it unattended. In addition, avoid burning it for too many hours at once. Testing may feel technical, yet it protects both the user and the product. It also helps home candle makers improve future batches. Reliable Aromatherapy candles should not only smell pleasant. They should also burn consistently, safely, and cleanly under normal conditions.
Turn Candle-Making into a Personal Creative Ritual
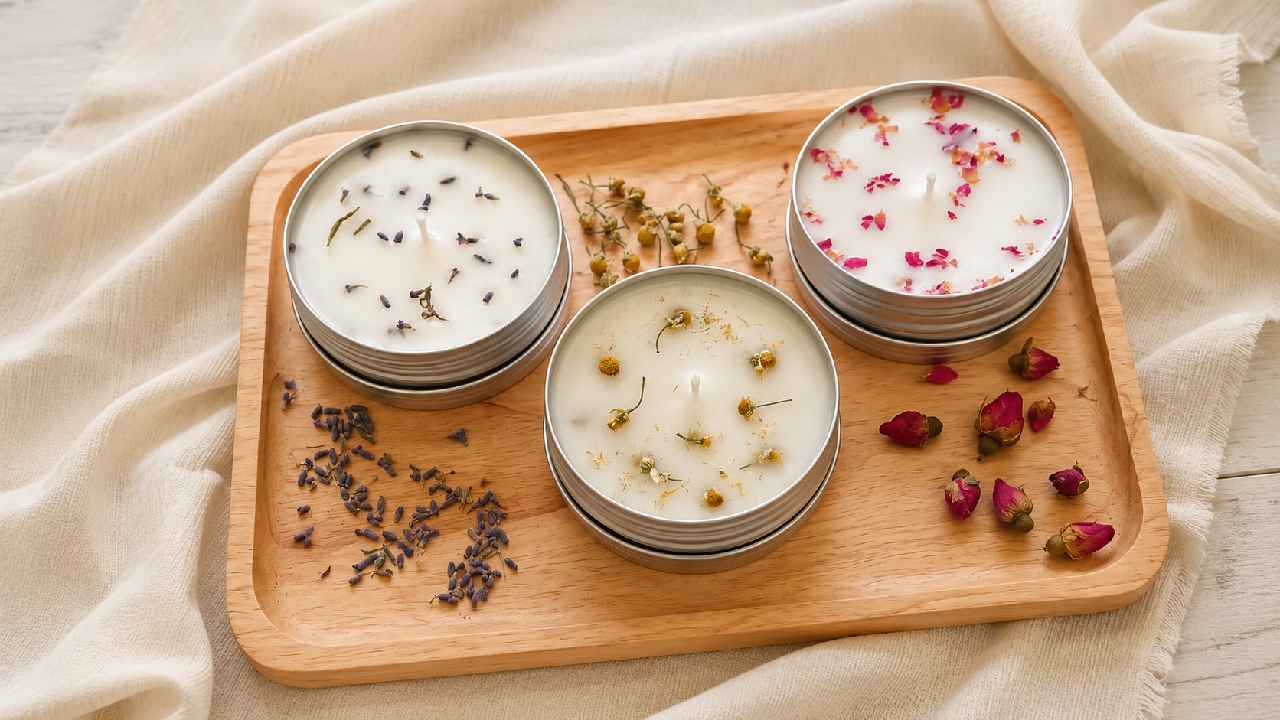
Making candles at home can become more than a weekend project. It may develop into a relaxing ritual that combines scent, design, and practical creativity. You can create seasonal collections, personalized gifts, or candles designed for reading, meditation, and quiet evenings. Simple labels and reusable jars can add a professional touch without making the project expensive. Moreover, recording each recipe helps you understand which fragrance combinations work best. Write down the wax weight, oil percentage, pouring temperature, wick size, and curing time. Over time, these notes become valuable personal experience. Still, creativity should never replace safety. Decorative flowers, herbs, and crystals may look beautiful, but placing flammable materials near the wick can be dangerous. Therefore, keep the candle surface simple and safe. With patience and careful testing, homemade Aromatherapy candles can bring warmth, personality, and meaningful comfort into everyday life.